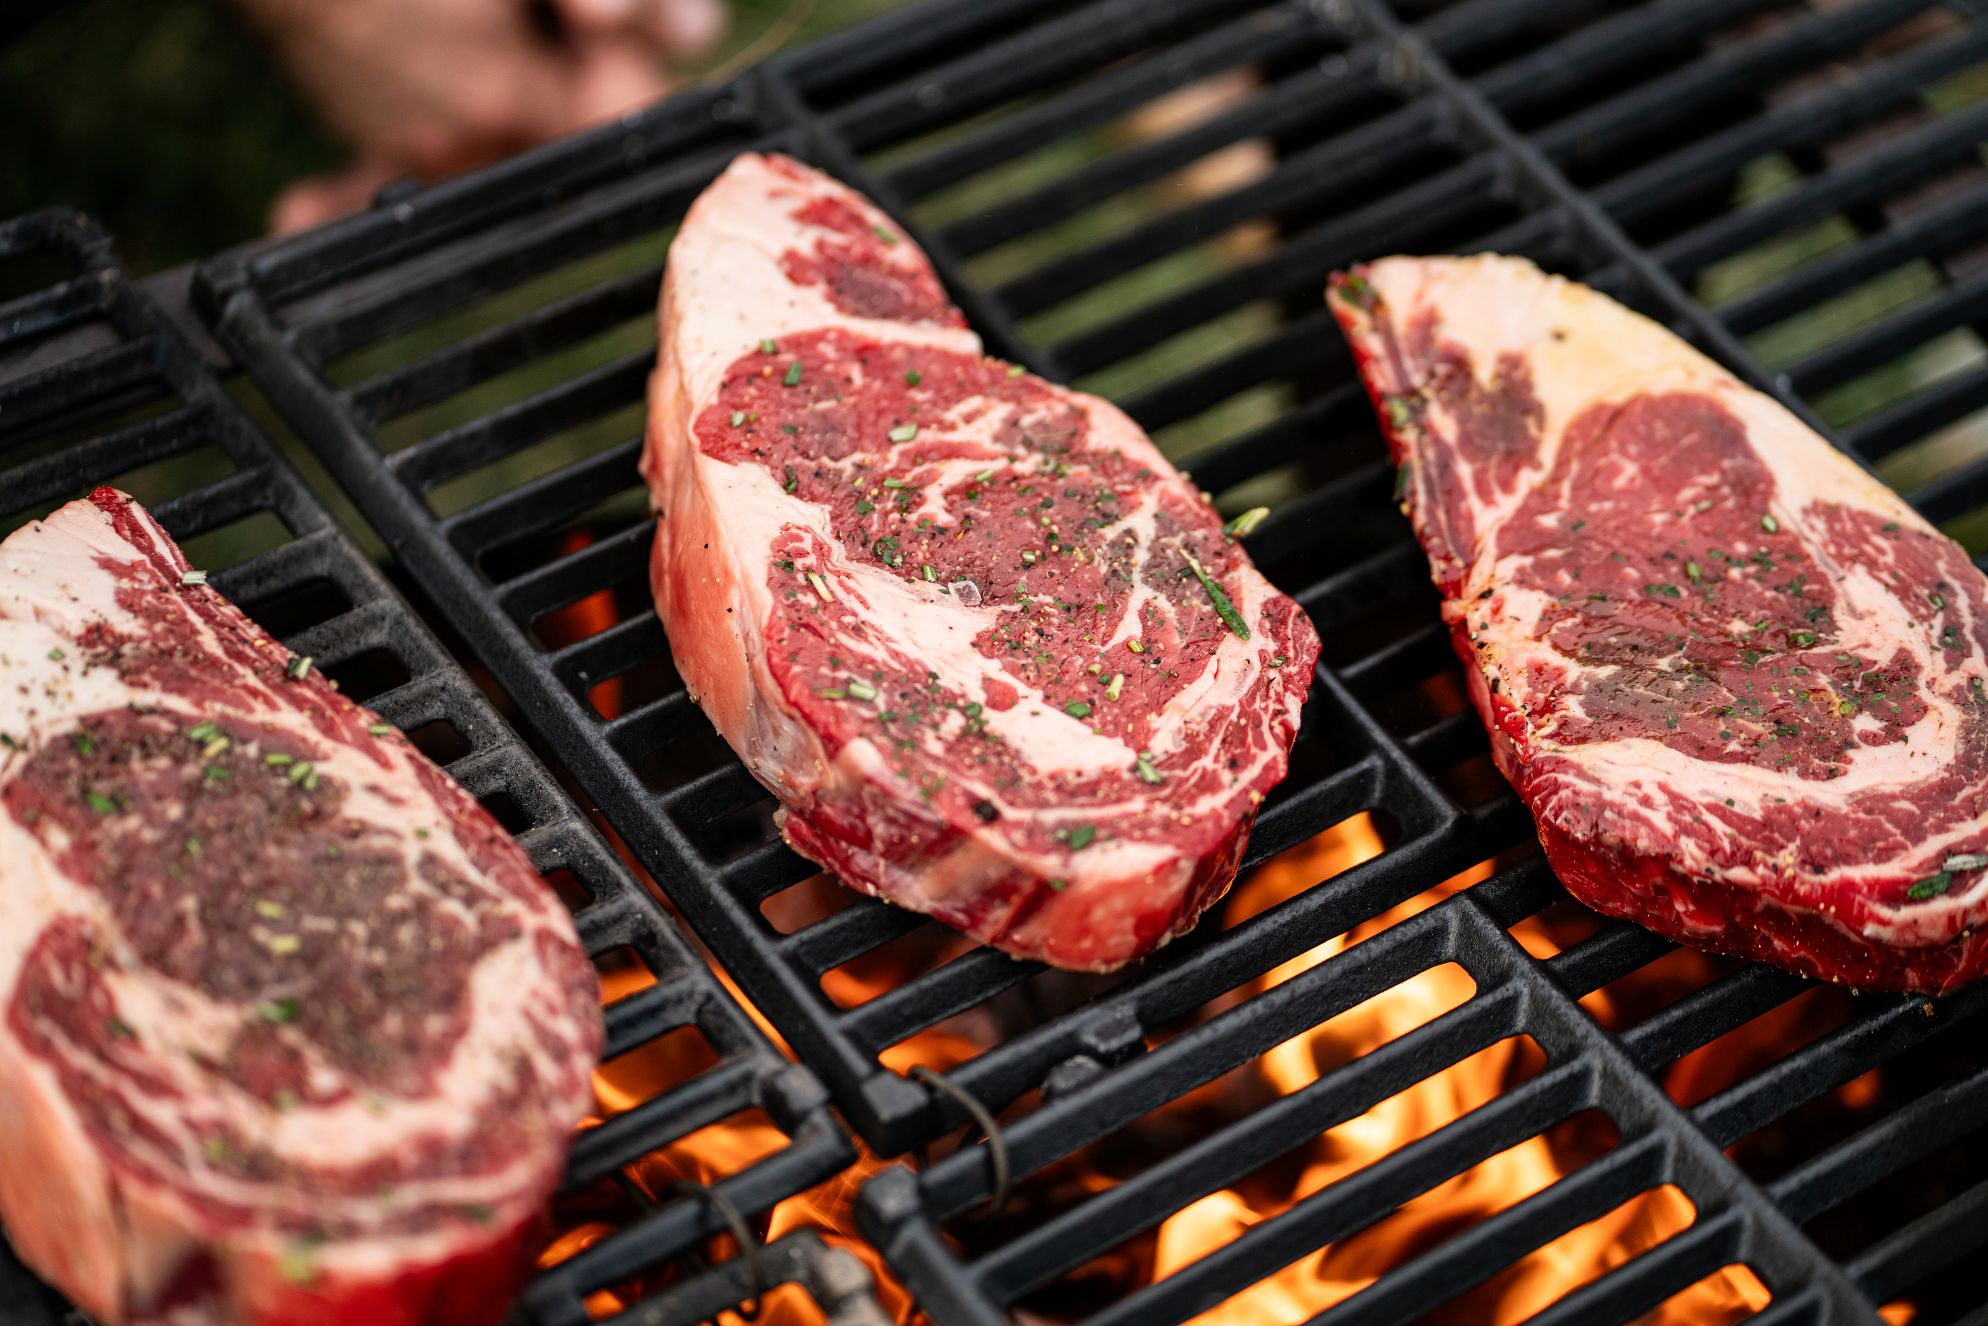
Crispy edges, sizzling garlic and enough herbs to make your cutting board smell like a steakhouse garden party. This ribeye recipe keeps things simple, letting rich, grass-finished beef do most of the heavy lifting.
Ingredients
4 ribeye steaks (we suggest Forward Farms ribeye); 8-12 oz. per person 8 Tbsp granulated garlic 8 cloves garlic, thinly sliced 8 Tbsp coarse salt 4 Tbsp pepper (to taste) 4 Tbsp beef tallow 4 sprigs rosemary 4 Tbsp thyme
Directions
Remove steaks from refrigerator 30-45 minutes before cooking to get to room temperature. This is also a good time to start grill, if using charcoal or gas to allow the grill to get to a high temperature on one side and set the other side of the grill to medium low.
Pat steak dry with paper towels.
For each steak, season one side with 2 Tbsp granulated garlic, 2 Tbsp coarse salt and 1 Tbsp crushed black pepper (or to taste).
In a saucepan, gently soften the tallow with rosemary, thyme and thinly sliced garlic.
Brush the tallow mixture over both sides of the steak.
When grill is hot, add steak and sear 2-3 minutes on each side to form a nice crust.
Place the steak on the warm side of the grill and rest for 10 minutes and to get to desired internal temperature. 120-130° is rare, 130-135° medium rare, 135-145° medium, 145-155° medium well and 160° + well done.
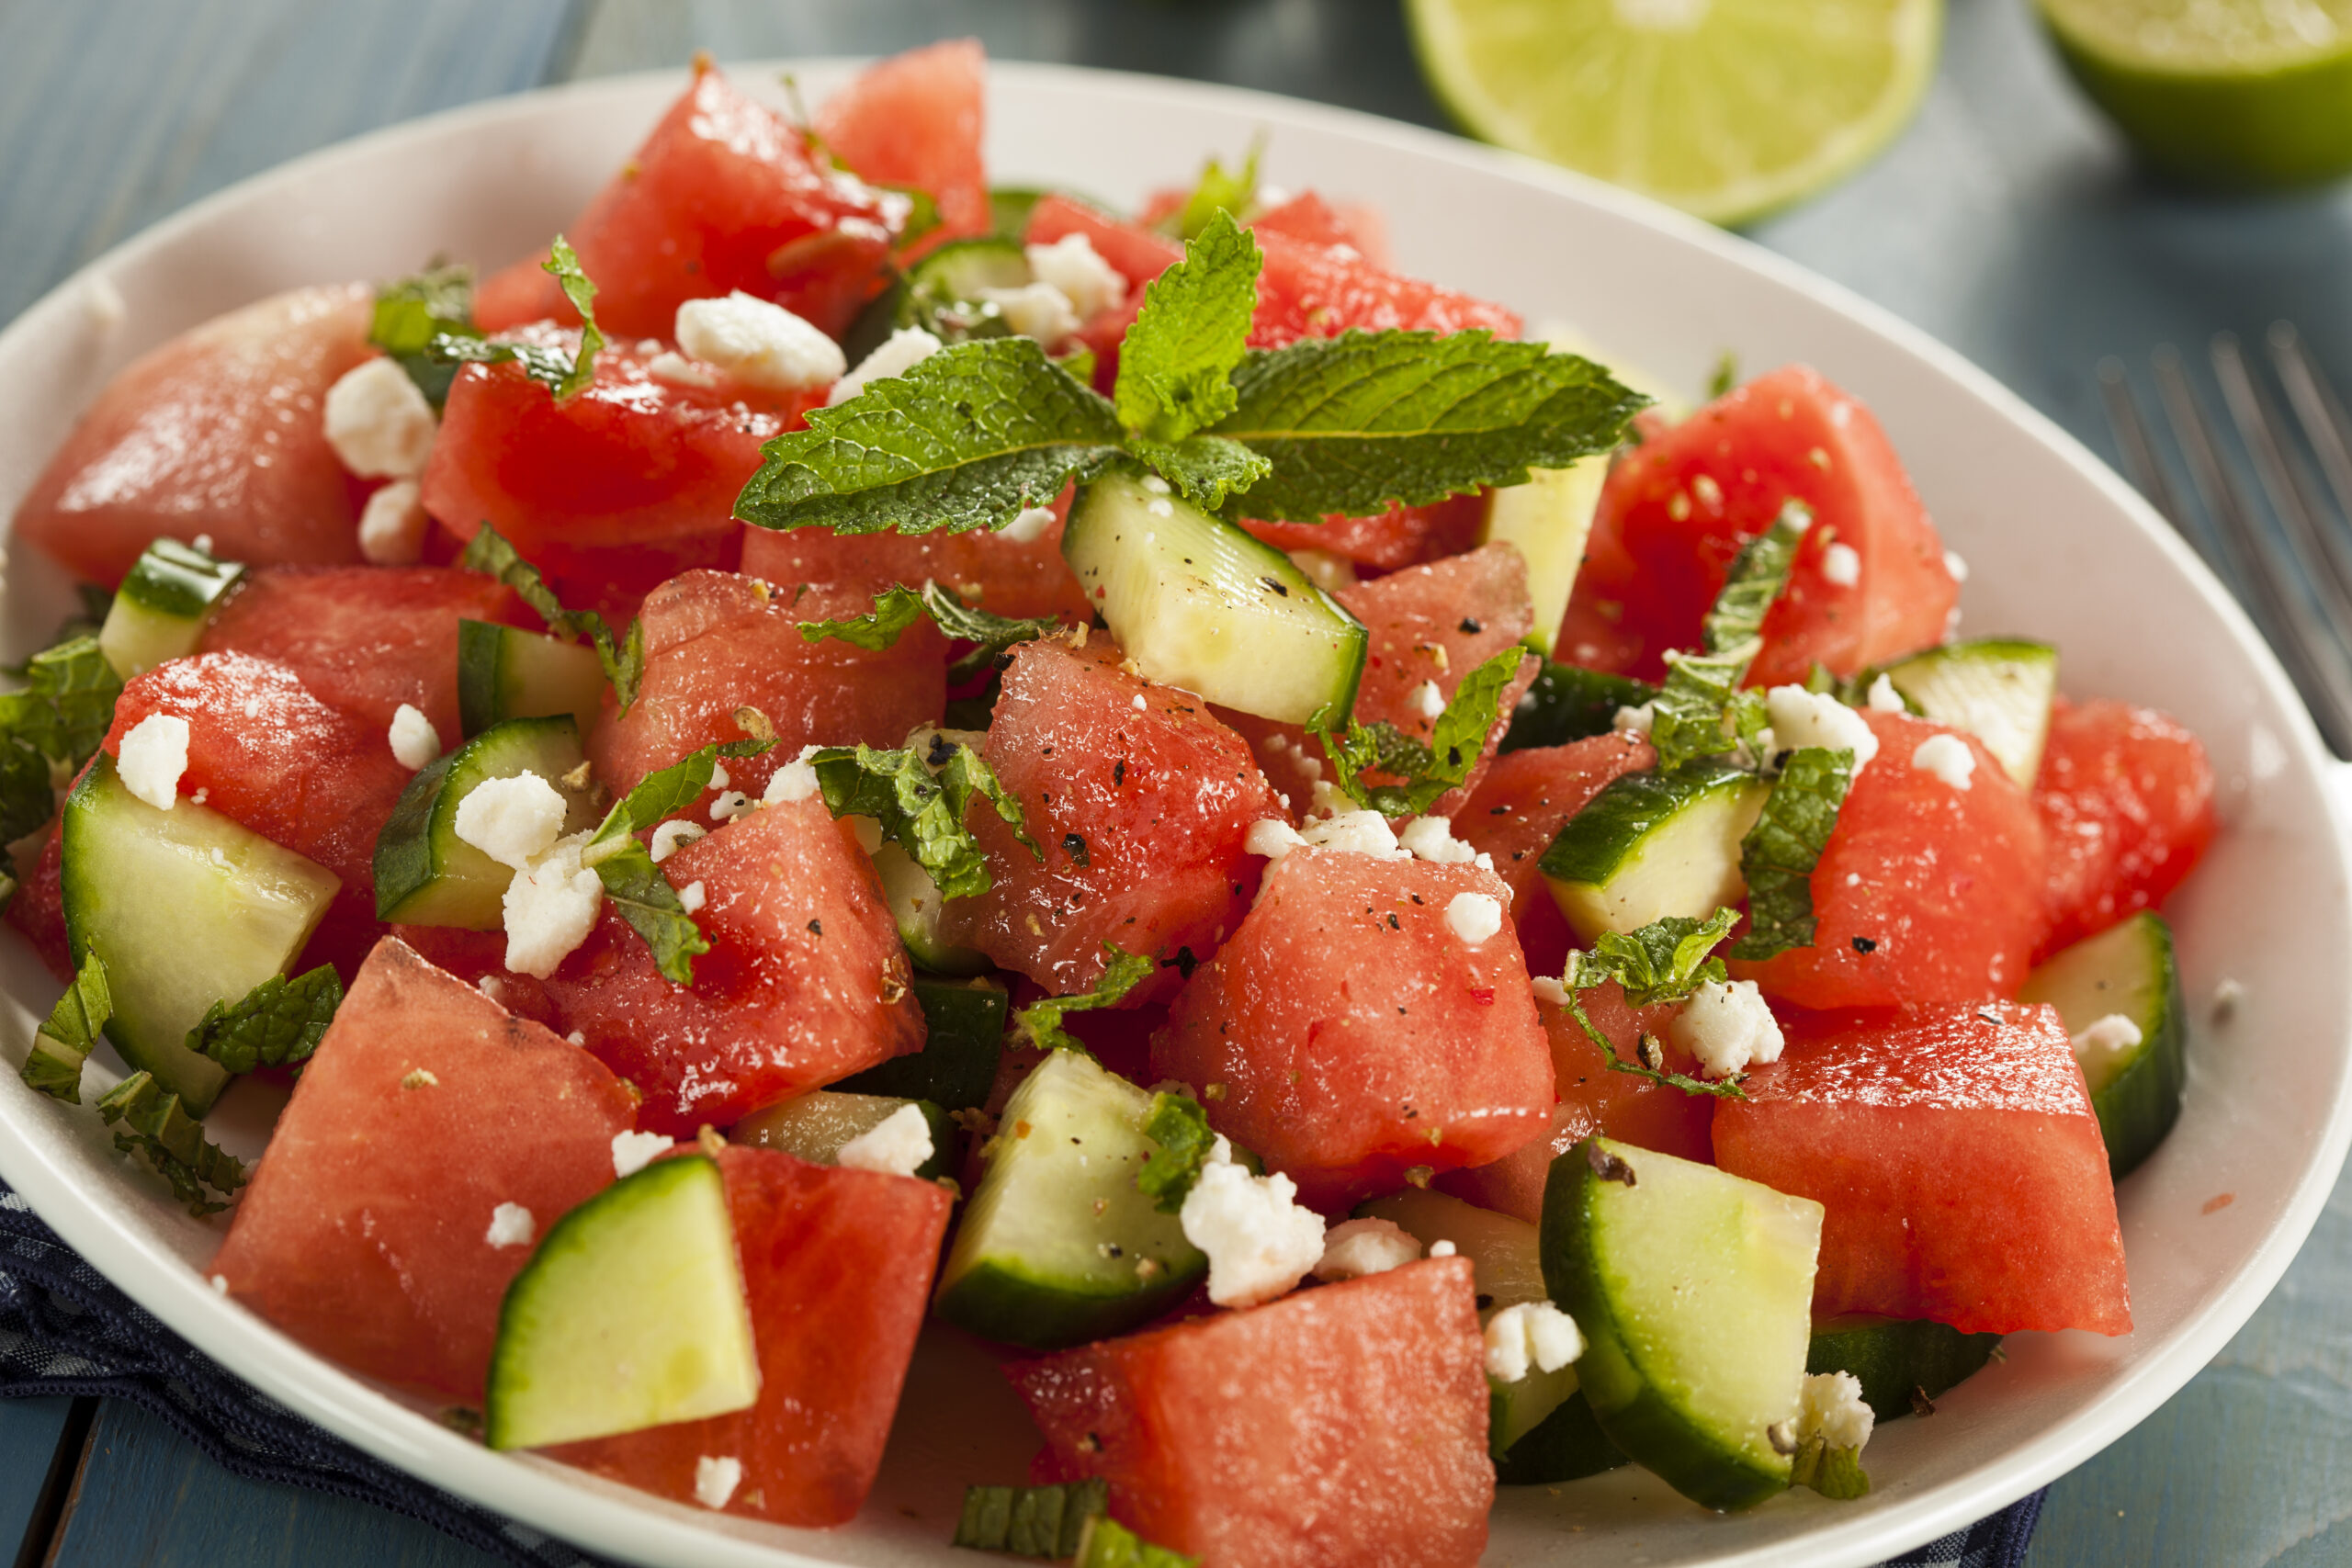
Feeling ‘meloncholy’? Not anymore. One bowl of this punchy chili-lime watermelon and mint salad with cotija and your whole outlook improves. Probably. It at least can’t hurt.
Ingredients
4 cups watermelon, cubed 1 ripe avocado, diced ¼ cup thinly sliced cucumber (Persian if you can) 2–3 tbsp fresh lime juice Zest of 1 lime 1–2 tsp chili flakes or chili crisp (to taste) 1 small jalapeño or serrano, very thinly sliced ¼ cup fresh mint leaves ¼ cup fresh cilantro 2–3 tbsp crumbled cotija or feta 1–2 tsp local honey (optional, depending on sweetness) Pinch of flaky sea salt Other Optional Add-Ons: A splash of good olive oil Grilled corn kernels Tajín on the rim if serving in bowls/glasses
Directions
Gently combine watermelon, avocado and cucumber.
In a small bowl, whisk lime juice, zest, chili and honey.
Toss everything lightly—don’t overmix or you’ll lose the texture.
Fold in herbs, then finish with cheese, jalapeño slices and flaky salt.
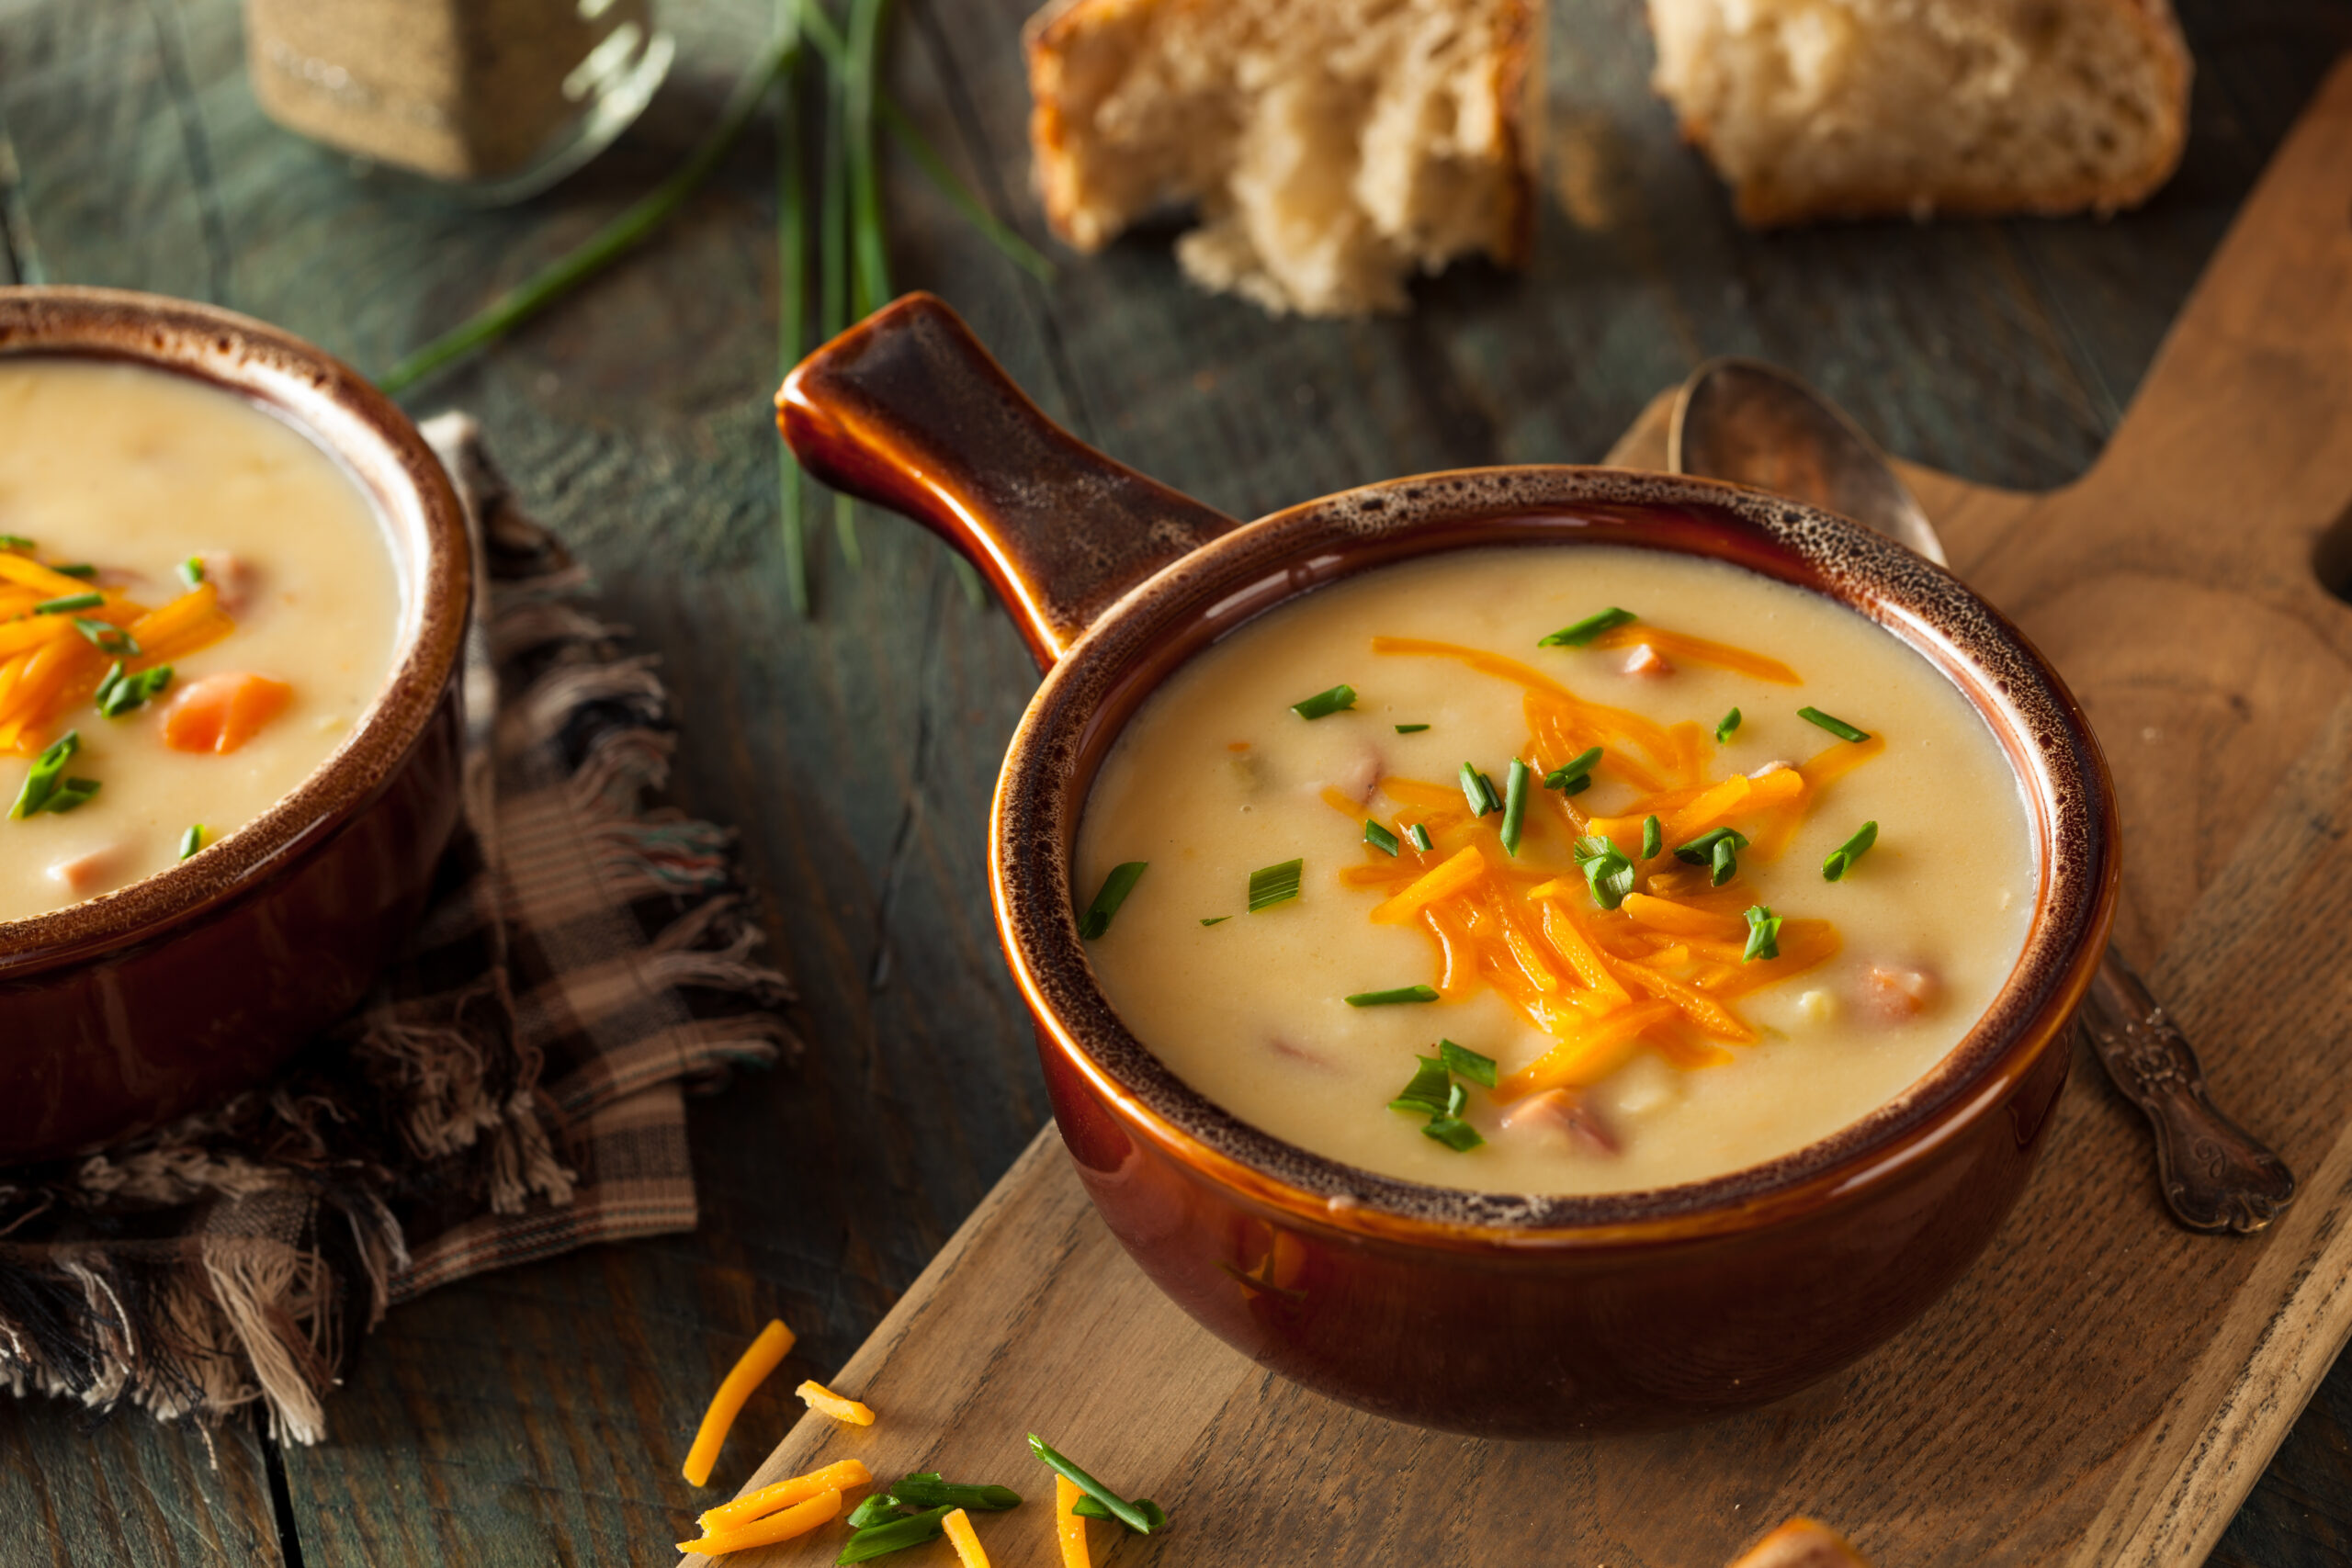
A true Wisconsin classic, beer cheese soup brings together sharp cheddar, rich broth and a splash of beer for a creamy, comforting bowl that tastes like pure Midwest nostalgia. This recipe also works well as a dip, served with veggies, bread and the like.
Ingredients
2 Tbsp butter 1 Tbsp olive oil 1 large yellow onion, thinly sliced 2 cloves garlic, minced 2 Tbsp flour 1 ½ cups vegetable or chicken broth 1 cup beer (lager or pale ale works best; we like any version from Crooked Lane Brewing) 1 cup whole milk 1 cup half-and-half (or sub more milk) 2 cups sharp cheddar cheese, freshly grated 1 tsp Dijon mustard ½ tsp smoked paprika Salt and black pepper, to taste Optional: pinch of cayenne or a dash of hot sauce; toppings such as toasted bread crumbs/croutons, chopped chives/green onions/herb of choice, extra shredded cheese
Directions
In a large pot over medium heat, melt butter with the olive oil. Add sliced onion and cook slowly, stirring often, until soft and lightly caramelized, about 12–15 minutes.
Add garlic and cook for another minute, just until fragrant. Sprinkle in flour and stir to coat the onions, cooking for 1–2 minutes to remove the raw flour taste.
Slowly whisk in broth, making sure to smooth out any lumps, then pour in beer. Let mixture simmer for about 5 minutes to cook off some of the alcohol and mellow the flavor.
Reduce heat to low and stir in milk and half-and-half. Once warmed through (but not boiling), begin adding cheese a handful at a time, stirring until fully melted before adding more.
Stir in mustard, smoked paprika and any optional heat. Taste and adjust with salt and pepper as needed.
Serve warm with toasted bread, a sprinkle of chives and an extra handful of cheddar on top.
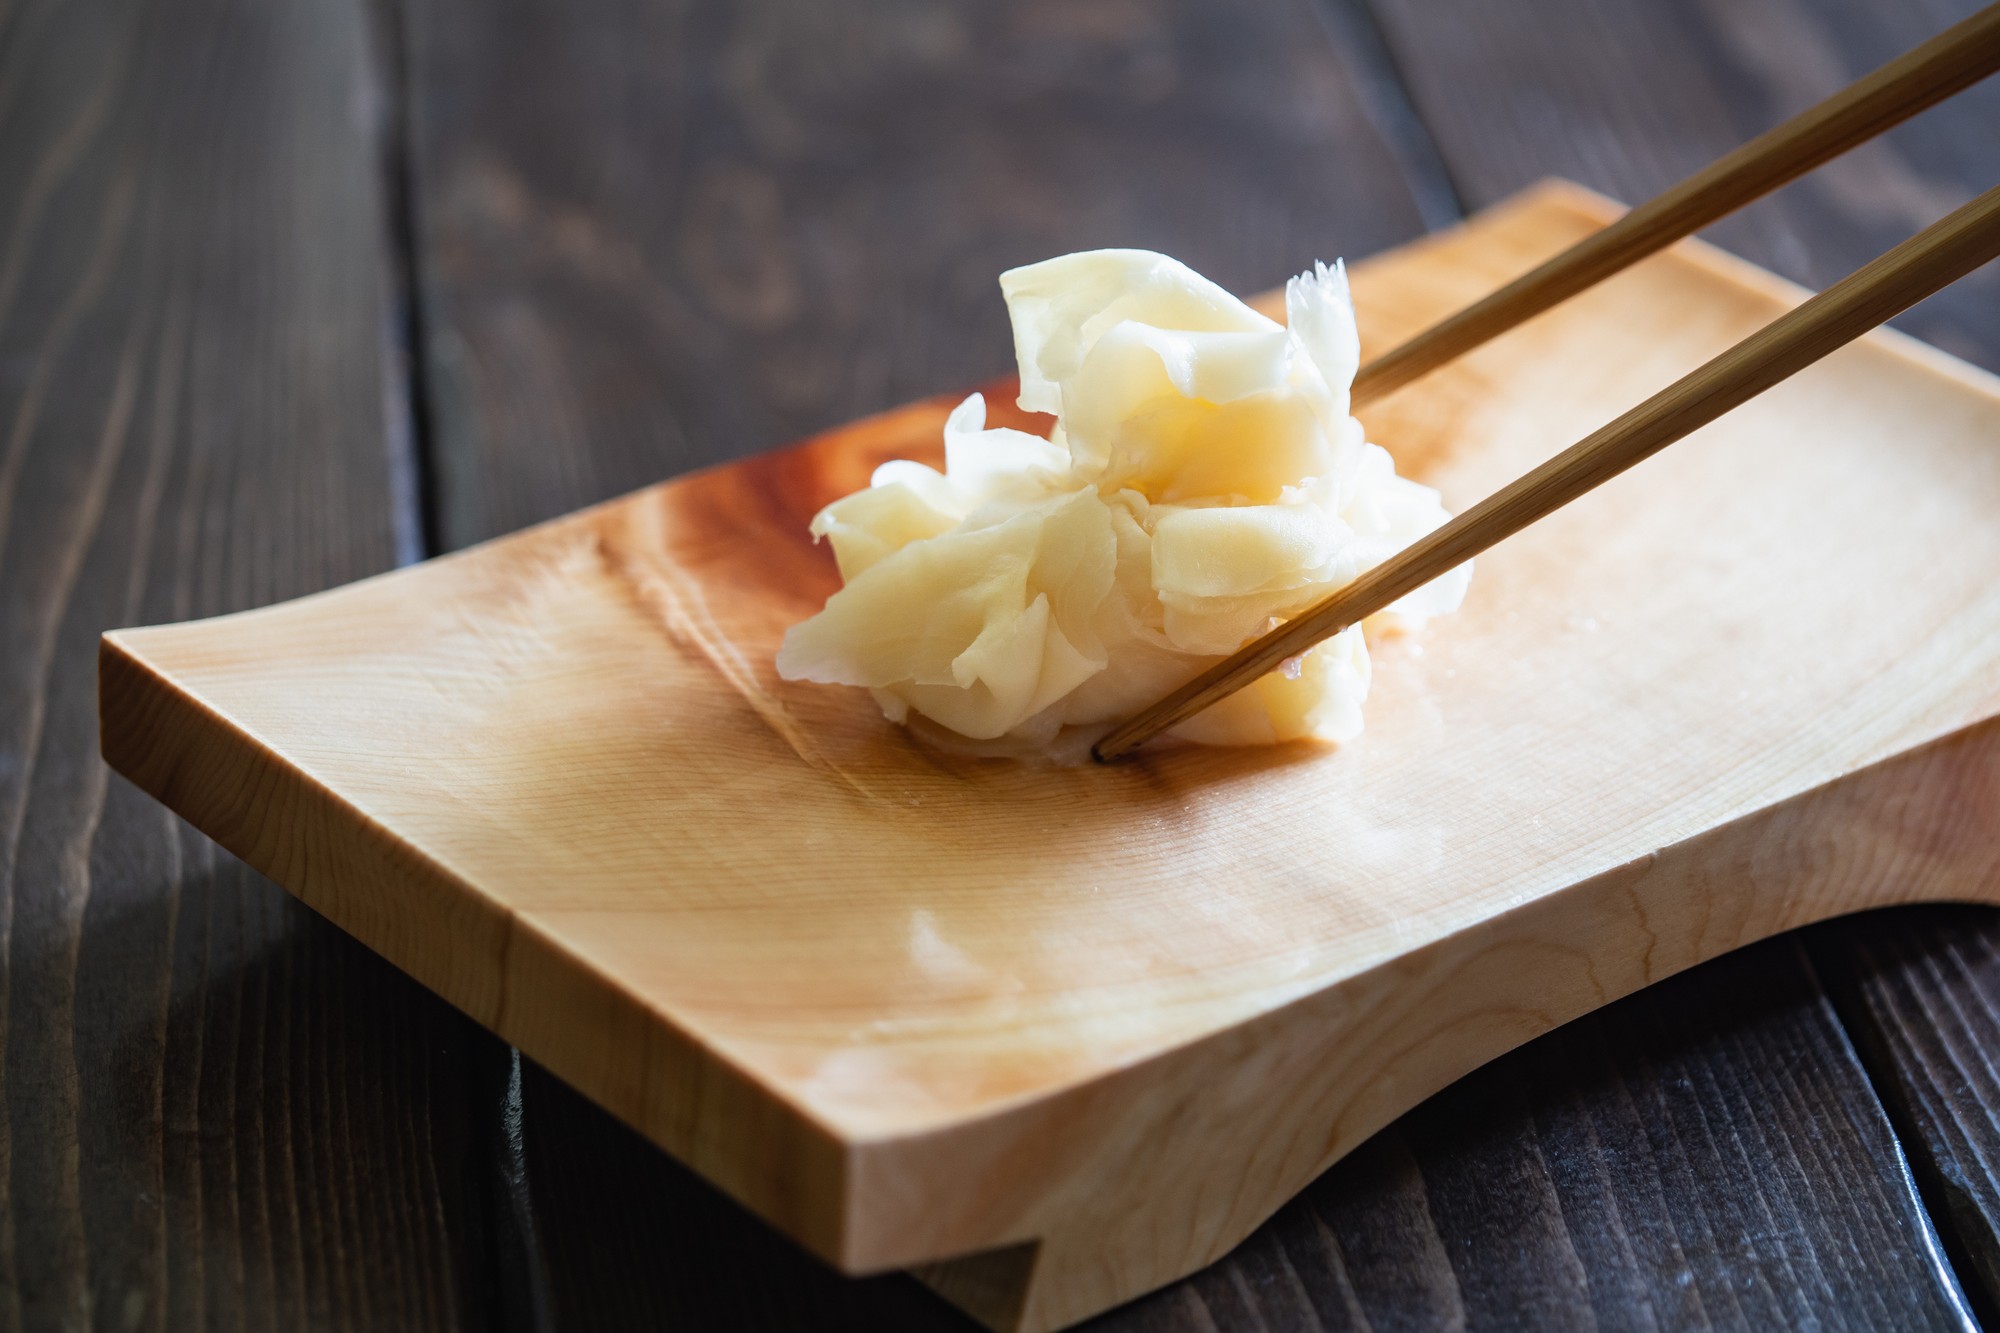
Make your own. Woo-hoo!!! No more making that little bit that comes with your sushi stretch until the last bite.
Ingredients
8 oz ginger root, peeled – young ginger preferred but any ginger ok
1 ½ tsp sea salt
2/3 cup rice wine vinegar
1/3 cup white vinegar
¼ – 1/3 cup sugar
Directions
Put ginger pieces in a bowl with salt and coat evenly. Let sit about 30 minutes.
Rinse salt well from ginger pieces and pat dry. Slice very thinly using a sharp knife, mandoline or y-shaped veggie peeler.
In a small saucepan over medium heat, add vinegar and sugar. Stir until sugar is dissolved. Increase heat and bring to a boil. Lower heat and put in ginger slices, stirring so they don’t stick together, for about 5 minutes.
Remove from heat and place ginger and liquid into a jar. Secure lid and store in the refrigerator for up to a week before serving, although some folks say you can enjoy it the same day…up to you!
Note: A reaction between ginger and rice wine vinegar may turn ginger slightly pinkish color.
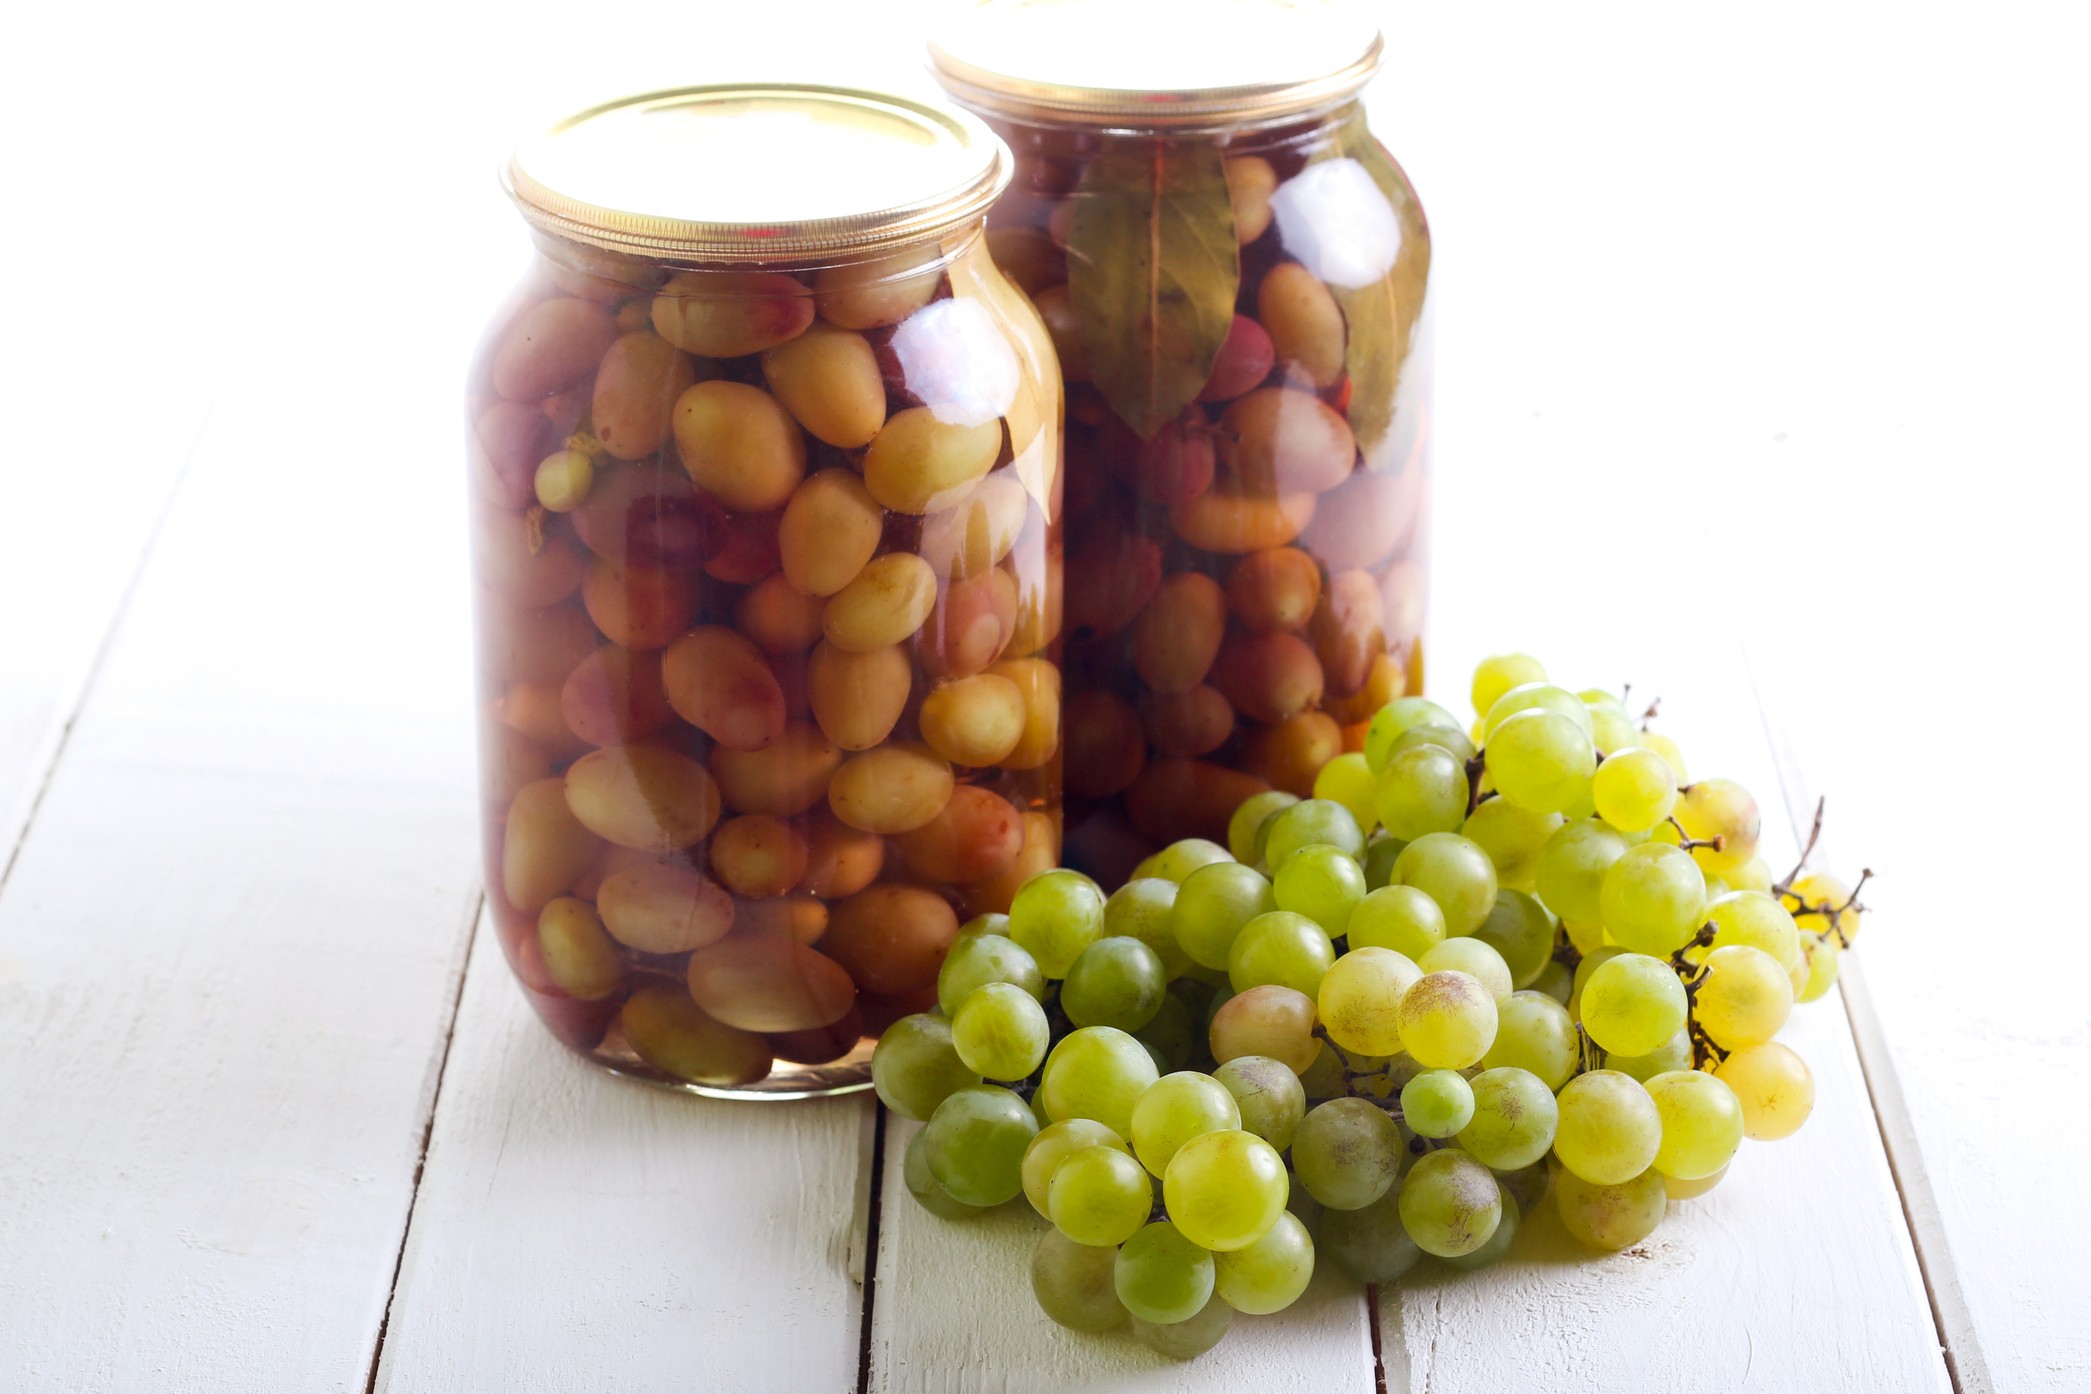
These are great for snacking, or as an unexpected side for your next barbecue.
Ingredients
1 lb red or green grapes
1 cup red wine vinegar
½ cup apple cider vinegar
1 cup water
1 cup sugar – white or brown
1 shallot, cut into slivers
1-inch piece peeled ginger, chopped
1 tsp yellow mustard seeds
1 ½ tsp coriander seeds
1 tsp black peppercorns
1 cinnamon stick
1 bay leaf
1 star anise pod
1 dried allspice berry
Directions
Make sure all the grapes you’re using are firm and unblemished. Leave whole or cut in half (for greater absorption of pickling liquid) and place in quart-size Mason jar.
Add all other ingredients to a saucepan and bring to a boil. Reduce heat to low and simmer until shallot is softened, about 10 minutes. Remove saucepan from heat, cool 15 minutes.
Pour liquid over grapes, gently swirling so spices incorporate. Let jar sit on counter until it reaches room temperature and then cover and refrigerate 2 hours to one day before serving. Should keep up to one month in refrigerator.
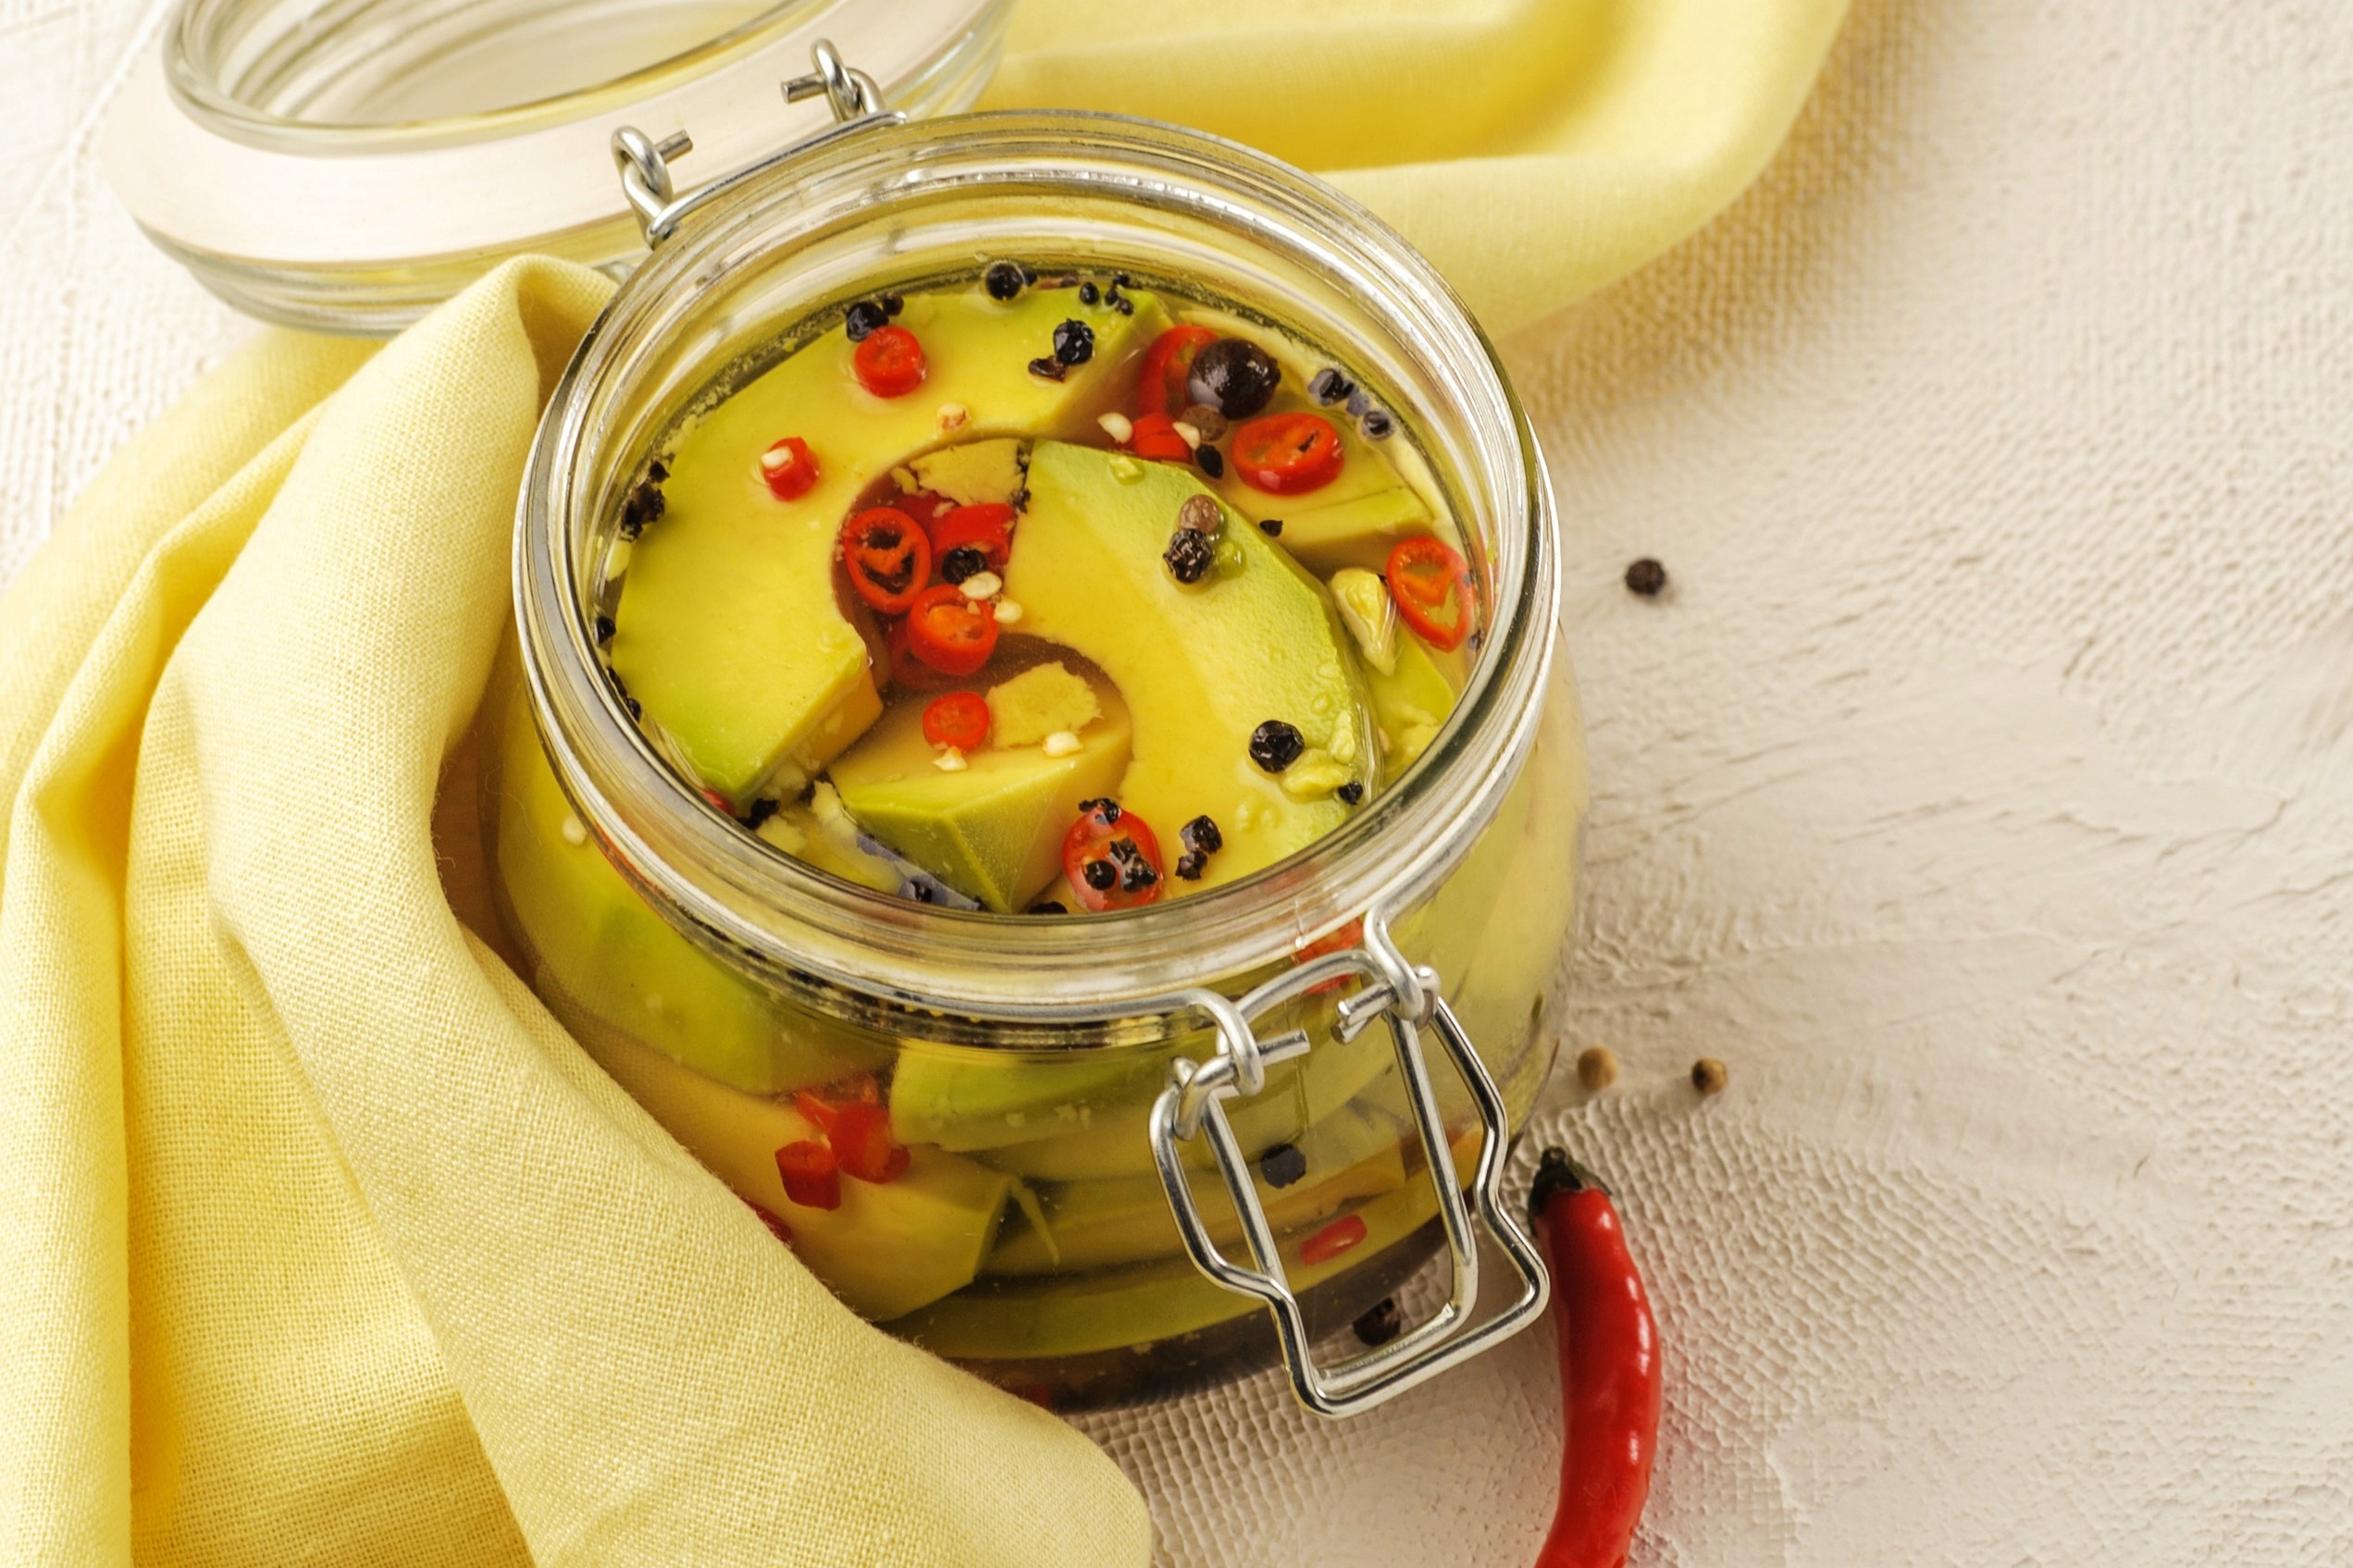
Use underripe avocados for this one, and you can use the brine more than once!
Ingredients
1 ¼ cups vinegar – distilled white, apple cider or rice wine
1 cup water
½ cup sugar
1 Tbsp kosher salt
½ tsp brown mustard seeds
½ tsp coriander seeds
½ tsp cumin seeds
1 tsp chopped fresh dill
½ tsp black peppercorns
½ tsp chili flakes
2 cloves garlic, smashed and rough chopped
2 underripe avocados
Optional: Additional sliced hot chili peppers, like jalapenos
Directions
Add vinegar and water to a saucepan and stir in salt and sugar. Add spices and herbs and bring to a boil. Once salt and sugar have dissolved, remove from heat and cool to room temperature.
Peel and slice each avocado into ½-inch wide slices.
Divide garlic, fresh chili slices (if using) and avocado slices between two wide-mouth pint-sized jars.
Stir vinegar mixture once more and pour into jars to cover avocados. Close jar lids and put into the refrigerator for 2 – 24 hours for flavors to combine.